VideoFrame
Video is essentially just a series of images (called frames) with timestamps, indicating which frame to show at a given time during video playback.
The javascript VideoFrame class, likewise, is represented as a combination of pixel data (like RGB values) and some metadata (including the timestamp). Keep in mind that VideoFrame and other WebCodecs interfaces represent time in microseconds.

A VideoFrame has all the information needed to render or display the image in a <canvas>, or to access raw pixel data (e.g. for AI model inference), but can’t directly be stored in a normal video file.
An EncodedVideoChunk can’t directly be used to render or display an image, but you can directly read them from a video file, or write them to a video file.

These two classes (VideoFrame and EncodedVideoChunk) are the backbone of WebCodecs, the whole point of WebCodecs is to facilitate the transformation between EncodedVideoChunk and VideoFrame objects, and and you would use VideoFrame objects when you need access to the raw video data (e.g. rendering a video to a canvas).
Core Properties of a VideoFrame
Section titled “Core Properties of a VideoFrame”A VideoFrame object is just pixeldata + metadata, here are some of the main properties:
Format
Section titled “Format”When you normally think of pixel or image data, the default is to think about “RGB” where each image is decomposed into “red”, “green” and “blue” pixels. Actual computer displays actually use red, green and blue lights for each pixel, so whenever images or video frames are displayed on a device, at some point it is converted to “RGB” format.
VideoFrame objects use the RGBA space to capture this, with the A channel meaning alpha, which is a 4th channel denoting transparency, which shows up in some videos like graphics overlays but is not common.

Beyond the actual encoding, VideoFrame objects aren’t always stored in this simple RGB format, there are a few formats that video frames might take including I420 and NV12. What these do is to split the image into a different colorspace called YUV

Where the Y channel captures ‘brightness’, and the other two channels U and V capture non-bright color information.

Because human eyes are much more sensitive to changes in brightness than changes in color, it is common practice to apply Chroma Subsampling to only store a smaller resolution version of the U and V channels while preserving the Y channel, shaving off data for minimal loss in visual quality.
List of formats
Section titled “List of formats”I420- Normal YUV subsampling, with aYchannel and sub-sampledUandVchannels.NV12- Similar to YUV, but instead of storing data in 3 planes, it interleaves the UV data together into one planeRGBA- Standard RGB but with an alpha channelBGRA- Same as RGB, but in reverse order (Blue, Green, Red)
When displaying these frames to canvas, extracting ImageData or doing any manipulation with WebGPU or WebGL, the data will automatically be converted to RGBA to facilitate processing, so as an application developer you often don’t need to do anything special to handle different frame types, but do be aware that under the hood the data corresponding to each frame actually is different for different types
Coded Height and Display Height
Section titled “Coded Height and Display Height”You’ll notice that VideoFrame objects have a codedHeight and displayHeight property, as well as codedWidth and displayWidth. You might be curious as to why there would be two width properties and height properties, but this has to do with how video compression algorithms work.
Most video codecs use a concept called macroblocks which are square chunks of the image (say 16x16 pixels) on which a specific compression techniques are applied.

A 1080p video might use all 16x16 macroblocks, but you’ll notice that 1080 pixels does not divide cleanly in macroblocks of size 16 (1080/16=67.5). One solution is to just round up, and encode 1088 pixels, but tell the video player to only display 1080 pixels, with some data thrown away.
This is essentially the difference between codedHeight and displayHeight. For the majority of videos in practice these are identical but not always, and it’s safer to use displayWidth and displayHeight for sizing images and canvases to be rendered to.
Creating new VideoFrames
Section titled “Creating new VideoFrames”When decoding video from a VideoDecoder, the format and codedHeight/displayWidth come from the source video, and these are read-only.
When creating a new VideoFrame (e.g. for encoding a video with VideoEncoder), you may or may not need to specify these.
For creating new VideoFrame objects from image sources (ImageData, ImageBitmap, <video>), you don’t need to specify format or codedHeight or codedWidth.
new VideoFrame(imageBitmap, {timestamp: 0, duration: 33000 /* microseconds*/});You can however construct a VideoFrame from raw binary data (ArrayBuffer, UInt8Array), but then you need to specify the format and codedHeight and codedWidth
new VideoFrame(buffer, {format:'RGBA', codedHeight: 360, codedWidth: 640, /* etc...*/});Timestamp and Duration
Section titled “Timestamp and Duration”Finally, VideoFrame objects have a timestamp (the time in the video’s timeline at which the frame appears) and a duration which is the duration of the frame.

Again, remember that VideoFrame and other WebCodecs interfaces represent time in microseconds (e.g. a timestamp of 48000000 means it happens 48 seconds into the video).
Getting VideoFrames
Section titled “Getting VideoFrames”Decoding
Section titled “Decoding”The primary way to get a VideoFrame is directly from VideoDecoder
import { demuxVideo } from 'webcodecs-utils'
const {chunks, config} = await demuxVideo(file);
const decoder = new VideoDecoder({    output(frame: VideoFrame) {        //Do something with the frame    },    error(e) {}});
decoder.configure(config);
for (const chunk of chunks){    decoder.decode(chunks)}
This will have all the metadata pre-populated as it’s coming from the source video.
Video Element
Section titled “Video Element”You can also grab video frames directly from a <video> element.
const video = document.createElement('video');video.src = 'big-buck-bunny.mp4'
video.oncanplaythrough = function(){    video.play();    function grabFrame(){        const frame = new VideoFrame(video);        video.requestVideoFrameCallback(grabFrame)    }    video.requestVideoFrameCallback(grabFrame)}
Like with the VideoDecoder, when grabbing frames from a <video>, it will have all the metadata prepopulated from the source video.
Canvas Element
Section titled “Canvas Element”You can also construct a VideoFrame from a <canvas>, which lets you create custom rendering pipelines or construct artificial video.
const canvas = new OffscreenCanvas(640, 480);const ctx = canvas.getContext('2d');
let frameNumber = 0;
function renderFrame(timestamp) {
  ctx.clearRect(0, 0, canvas.width, canvas.height);  ctx.fillText(`Frame ${frameNumber}`, canvas.width / 2, canvas.height / 2);

  const videoFrame = new VideoFrame(canvas, {    timestamp: frameNumber * (1e6 / 30), // 30fps, stored in microseconds  });
  frameNumber++;  requestAnimationFrame(renderFrame);}
requestAnimationFrame(renderFrame);
In this case though, you do need to supply the timestamp as the <canvas> just has pixel data, though you can also specify other metadata, such as the duration, format etc…
From raw pixel data
Section titled “From raw pixel data”You can also construct a video frame from raw video data, such as an ArrayBuffer or UInt8Array representing raw RGBA pixel values, which might be helpful when encoding video generated by AI models or data pipelines which return raw pixel data.
The following constructs a video frame that will change the RGB color value of the video frame over time.
const width = 640;const height = 480;const frameRate = 30;const frameDuration = 1000 / frameRate;
let frameNumber = 0;let lastFrameTime = 0;let fpsCounter = 0;let fpsTime = 0;
function renderFrame(timestamp) {
    // Create RGBA buffer (4 bytes per pixel)    const pixelCount = width * height;    const buffer = new ArrayBuffer(pixelCount * 4);    const data = new Uint8ClampedArray(buffer);
    // Oscillate between 0 and 255 over time (2-second cycle)    const cycle = frameNumber % (frameRate * 2);    const intensity = Math.floor((cycle / (frameRate * 2)) * 255);
    // Fill entire frame with solid color    for (let i = 0; i < pixelCount; i++) {    const offset = i * 4;    data[offset + 0] = intensity;     // Red    data[offset + 1] = intensity;     // Green    data[offset + 2] = intensity;     // Blue    data[offset + 3] = 255;           // Alpha (always opaque)    }
    // Create VideoFrame from raw pixel data    // Remember we need to supply format and codedWidth/height    const videoFrame = new VideoFrame(    data,    {        format: "RGBA",        codedHeight: height,        codedWidth: width,        timestamp: frameNumber * (1e6 / frameRate),    }    );
    videoFrame.close()
    frameNumber++;
    requestAnimationFrame(renderFrame);}
requestAnimationFrame(renderFrame);
This provides full flexibility to programmatically construct a VideoFrame with individual pixel-level manipulation, but keep in mind that VideoFrame objects reside in graphics memory, and sending data to/from typed arrays (ArrayBuffer, UInt8Array) incurs memory copy operations and performance overhead [1]
Using Video Frames
Section titled “Using Video Frames”Once you have a VideoFrame, there are two ways to use them.
Encoding
Section titled “Encoding”VideoFrame objects are the only input you can use when using WebCodecs to encode video, so if you want to encode video in the browser, you need your source video data as VideoFrame. Here’s an example of encoding a canvas animation via VideoFrame objects.
const canvas = new OffscreenCanvas(640, 480);const ctx = canvas.getContext('2d');let frameNumber = 0;const encoded_chunks = [];
const encoder = new VideoEncoder({    output: function(chunk){        encoded_chunks.push(chunk)        if(encoded_chunks.length === 150) // Done encoding, time to mux    },    error: function(e){console.log(e)}})
encoder.configure({    codec: 'vp09.00.41.08.00',    width: canvas.width,    height: canvas.height,    bitrate: 1e6,    framerate: 30})
function renderFrame(timestamp) {
  ctx.clearRect(0, 0, canvas.width, canvas.height);  ctx.fillText(`Frame ${frameNumber}`, canvas.width / 2, canvas.height / 2);
  const videoFrame = new VideoFrame(canvas, {    timestamp: frameNumber * (1e6 / 30), // 30fps, stored in microseconds  });
  encoder.encode(videoFrame, {keyFrame: frameNumber%60==0})  videoFrame.close();
  frameNumber++;  if(frameNumber < 150) requestAnimationFrame(renderFrame);  else encoder.flush();
}
requestAnimationFrame(renderFrame);
Rendering
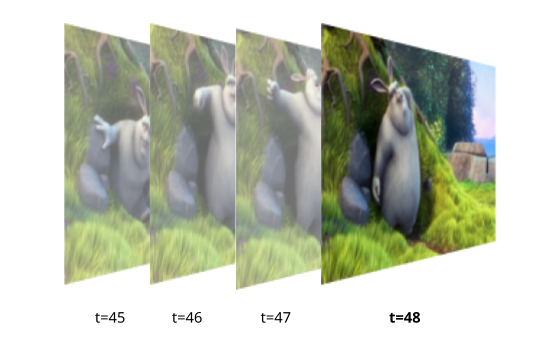
Section titled “Rendering”You can also render a VideoFrame to canvas. Here is the player example we showed previously where you are rendering video to a canvas.
import { demuxVideo } from 'webcodecs-utils'
async function playFile(file: File){
    const {chunks, config} = await demuxVideo(file);    const canvas = document.createElement('canvas');    const ctx = canvas.getContext('2d');
    const decoder = new VideoDecoder({        output(frame: VideoFrame) {            ctx.drawImage(frame, 0, 0);            frame.close()        },        error(e) {}    });

    decoder.configure(config);
    for (const chunk of chunks){        decoder.decode(chunks)    }
}
Memory
Section titled “Memory”As mentioned previously, raw video data (and specifically individual VideoFrame) objects take up a lot of memory, with a single 1080p frame taking up ~ 8 MB.
Most graphics cards usually have 2-4 GB of video memory (integrated graphics cards reserve a portion of system RAM), meaning a typical device can only hold several hundred 1080p video frames (~20 seconds of raw video data) in memory at a given moment.
When playing back a 1 hour 1080p video in a <video> tag, the browser will render frames progressively, displaying each frame as needed, and discarding frames immediately afterwards to free up memory, so that you could watch a 1 hour video with browser only keeping several seconds worth of actual raw, renderable video data in memory at a given time.
When working in WebCodecs, the browser gives you much lower level control over VideoFrame objects - when to decode them, how to buffer them, how to create them etc…, but you are also responsible for memory management.
Closing Frames
Section titled “Closing Frames”Fortunately, it’s pretty easy to ‘discard’ a frame, just use the .close() method on each frame after you are done, as in the frame callback in the simplified playback example.
const decoder = new VideoDecoder({ output(frame: VideoFrame) { ctx.drawImage(frame, 0, 0); frame.close() }, error(e) {}});Calling close() means the video memory is freed, and you can no longer use the VideoFrame object for anything else. You can’t
- Render a frame,
- Then call
close() - Then send the frame to an encoder.
But you can
- Render a frame,
- Then send the frame to an encoder.
- Then call
close()
close() is the last you should do with a VideoFrame , after you are done using it, and in whatever processing pipeline, you need to remember to close frames after you are done, and manage memory yourself.
Transferring
Section titled “Transferring”Like File objects, VideoFrame objects are CPU references to data tied to actual graphics memory. When you send a VideoFrame from the main thread to a worker (or vice-versa), you are transferring a reference to the frame. Nonetheless, it is still good practice to transfer the references
const worker = new Worker('worker.js');
const decoder = new VideoDecoder({    output(frame: VideoFrame) {        worker.postMessage({frame}, [frame])    },    error(e) {}});